Lugging around film gear in a minivan works, but here at Mac House, we’re all about streamlining the process so we can think less about the gear and more about the shoot. Our tried and true 2016 Dodge Caravan has served its purpose, but it was time to retire it to a dog mobile. So we picked up a 2021 Mercedes Sprinter in the high roof 144” wheelbase trim and started off with a window tint and satin black vinyl wrap by our friends over at 68 Auto Detail.


We wasted no time and got to planning where each major piece of equipment would live. Using a 4’x4’ floppy, we mocked up the partition between the cockpit and the equipment in order to pull some rough measurements. We stacked crates with ¼ apples in between in order to account for the space the rack would take up and the space needed to pull the crates in and out. With this, we were able to visualize the dimensions for how many crates tall and wide we could fit on our mobile grip cart and shelves.


The Initial Build
With a big shoot on the horizon to prepare for, all that we needed to get started on this project was a rough floor plan sketch, and a general idea of all the equipment we wanted to carry. We knew the flag storage, the overhead cabin storage, and the left rack all had to be the same height in order to accommodate the speed rail storage box. We knew we wanted a grip cart to fit in between the two of those, and our Inovativ cart and two hampers to fit within the leftover floorspace.
With a palette of five massive 11 gauge 4’x16’ aluminum diamond plate sheets, and enough steel to build the interior skeleton, we started cutting, welding and riveting. At this stage, in only two days of work between five people, we had a working prototype – unfinished metal with the functionality kinks yet to be worked out. We were ready to take the van to LA for its maiden voyage! There was only one issue… the shoot got canceled! But not to worry, we put the van to use over the next 6 month in this “unfinished” state, making tweaks and massaging the weak points along the way.


In order to mitigate the majority of the weight being on the left side, we used the weight of shot bags and sand bags to our advantage. Inspired by our friends at Bulldog Lighting and Grip, we built a side step delete which both flushed out the floor for horizontal hamper storage, and was a perfect hiding spot for 10 shot bags.


The Nitty Gritty Tweaks
Initially, we started with an inexpensive 6’ fold out ramp. It got us through a few shoots but we soon realized we were playing a dangerous game with the short 6’ length and the expensive equipment on our camera cart. We debated a lift gate but ultimately realized it would tarnish the sleek exterior look that we were after. But the decision was not solely based on aesthetics – the lift gate would need maintenance every so often and seemed to be a slower solution with up to two carts and two hampers being loaded and unloaded each time. After a good bit of research, we landed on the WM System Ramp with a 4’ width and 11’ length. The ramp can be quickly and easily deployed (even with a single person!) and allows us to safely wheel our carts in and out – a perfect solution for us.
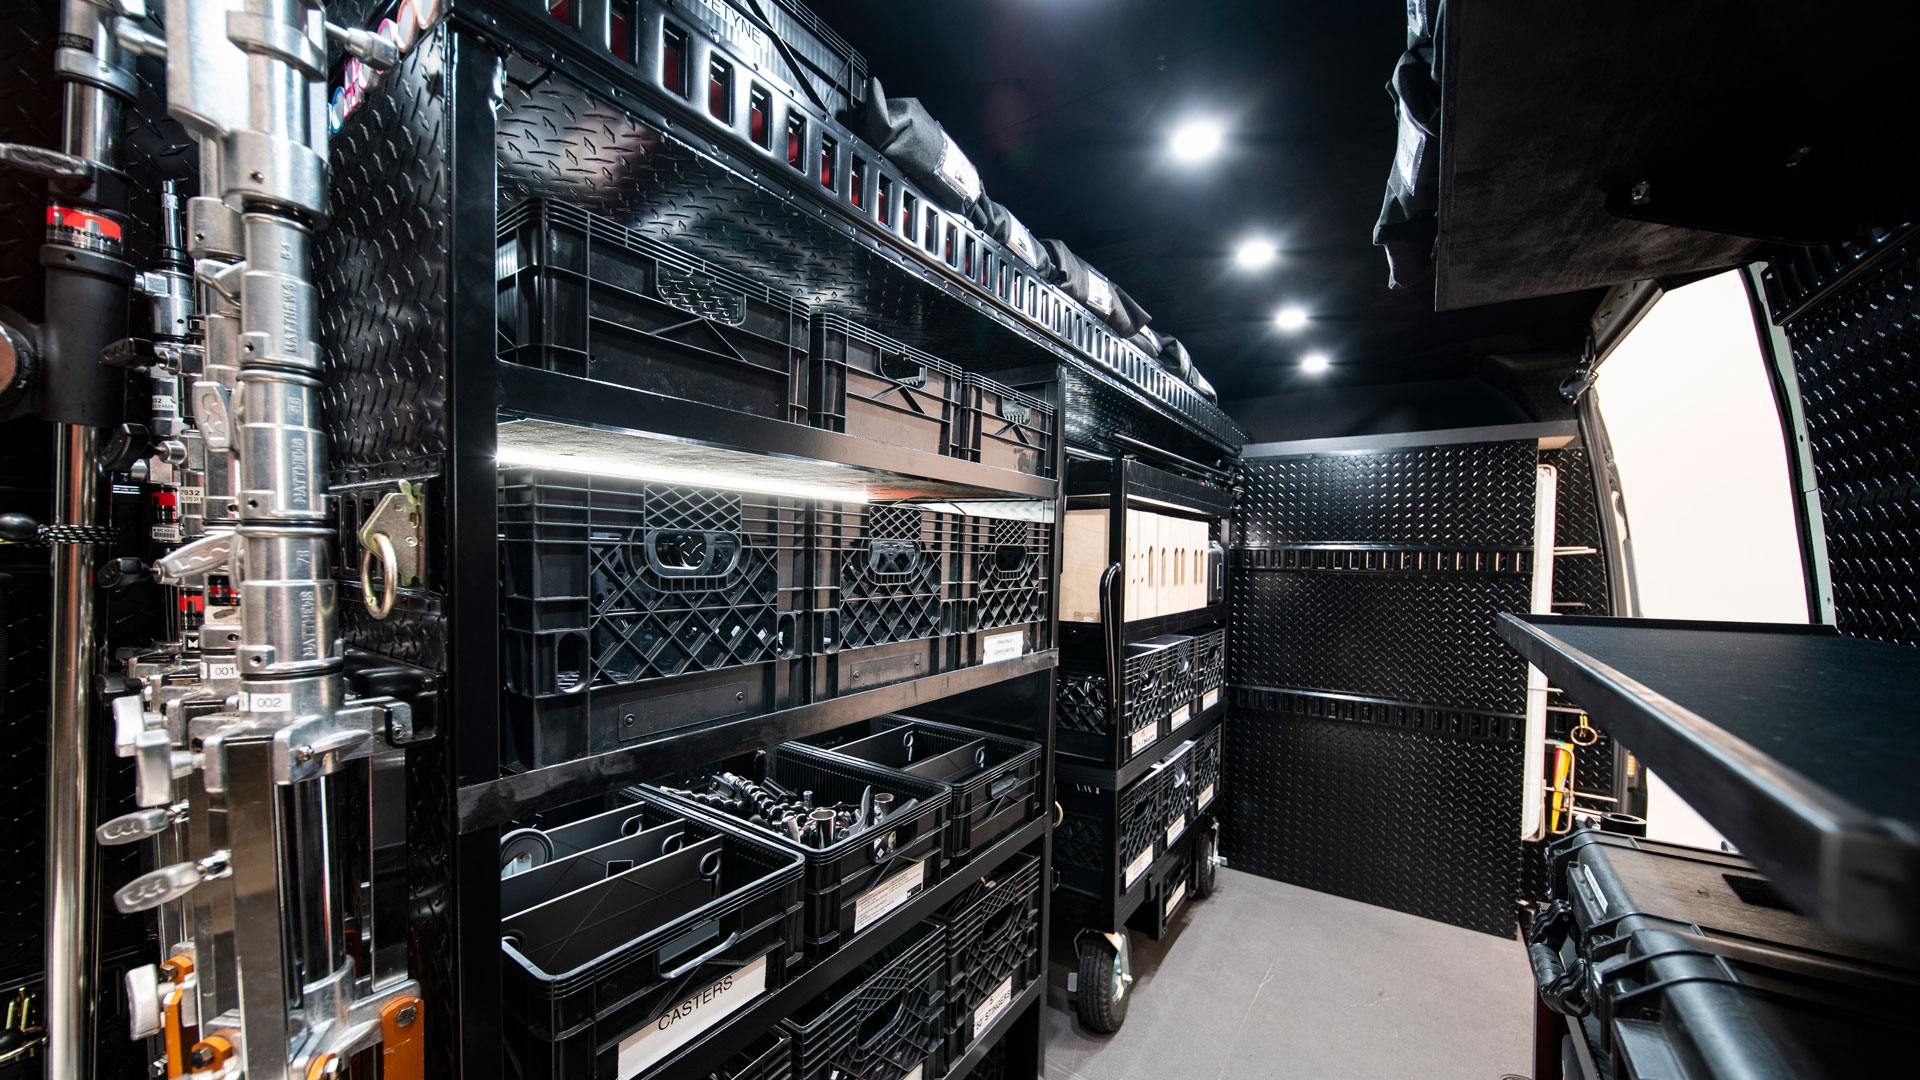
With the van still in a working prototype stage, we struggled to find convenient and accessible space to store complete C-Stands. Ideally, we could grab a single C-Stand when the van was staged nearby, or easily wheel all eight C-Stands to the set. At first, our grip cart could only fit C-Stands with the arms removed, but after some massaging, and pulling the left shelving all the way back to the ramp, we managed to fit eight complete C-Stands with the arms installed.


Our initial speed rail storage box was built before installing our WM System Ramp but the two ended up clashing. We could have fixed it with a simple work around but we knew there was also dead space we could reclaim, so we went the extra mile. Moving the 12’ speed rail to an external enclosure on the roof allowed for the rest of the speed rail to be condensed into one level. This meant we regained vertical space for rag storage and even half size crates.


With E-Track mounted all over the van interior, we’re not only able to strap everything down, but also mount fun accessories like a hammock and quick release shelving! We have a removable top shelf for rag storage and a middle shelf that doubles as a desk. It’s lined with a mouse pad material to make for a comfortable DIT and camera rigging station, making the van a one stop production shop!


Custom Roof Rack & On Board Power
Our auxiliary battery system allows us to charge our camera batteries and power accessories, such as interior lighting and even a fridge. Housed under the passenger seat, the Renogy 12V 100Ah Smart Lithium Battery is bluetooth-enabled which allows us to monitor capacity via the Renogy DC Home App. The battery feeds a 1000W inverter and charges via the smart alternator and three 100W solar panels. Solar was a much needed subsequent add-on that ensures we’re not quickly draining the battery when working out of the van on location. After scouring the web for a roof rack to accommodate solar, we didn’t love the options available for our needs. So we built our own. Our custom roof rack allows us to maximize space on the roof while keeping the exterior look sleek. Along with three 100W solar panels, we have 12’ speed rail storage, a.k.a. The Bazooka. This is easily accessible when the ramp is deployed and we still have half of the roof left over for ladders or any other longer items.


Finishing Touches
With everything in place and just how we liked it, there were only a few final touches left. We wanted to go the extra mile and make this van not only look the part, but also last the test of time. Six months of hard work was disassembled in one day and we had the van interior looking like the day we first bought it. Every piece of metal was off to powder-coat, every piece of wood was painted black and every last crevice was to be insulated to keep the hot California sun out. Reinstalling these freshly finished pieces and putting each piece of gear in its sanctioned place was like putting together adult Legos. As filmmakers, we had one major Lego piece missing: lighting. We went with seven flush mount LED lights installed into our headliner made custom from ¼” sheets of plywood that lived their previous lives as set pieces. Once the wood was shaped to size, we wrapped it in black alcantara fabric, installed the lighting, and fastened it all to the van’s ceiling structure. This beautifully lit the overall space but we didn’t stop there. We used COB LED strips for nice even highlights on each level of shelving for visibility when grabbing gear off of the racks.


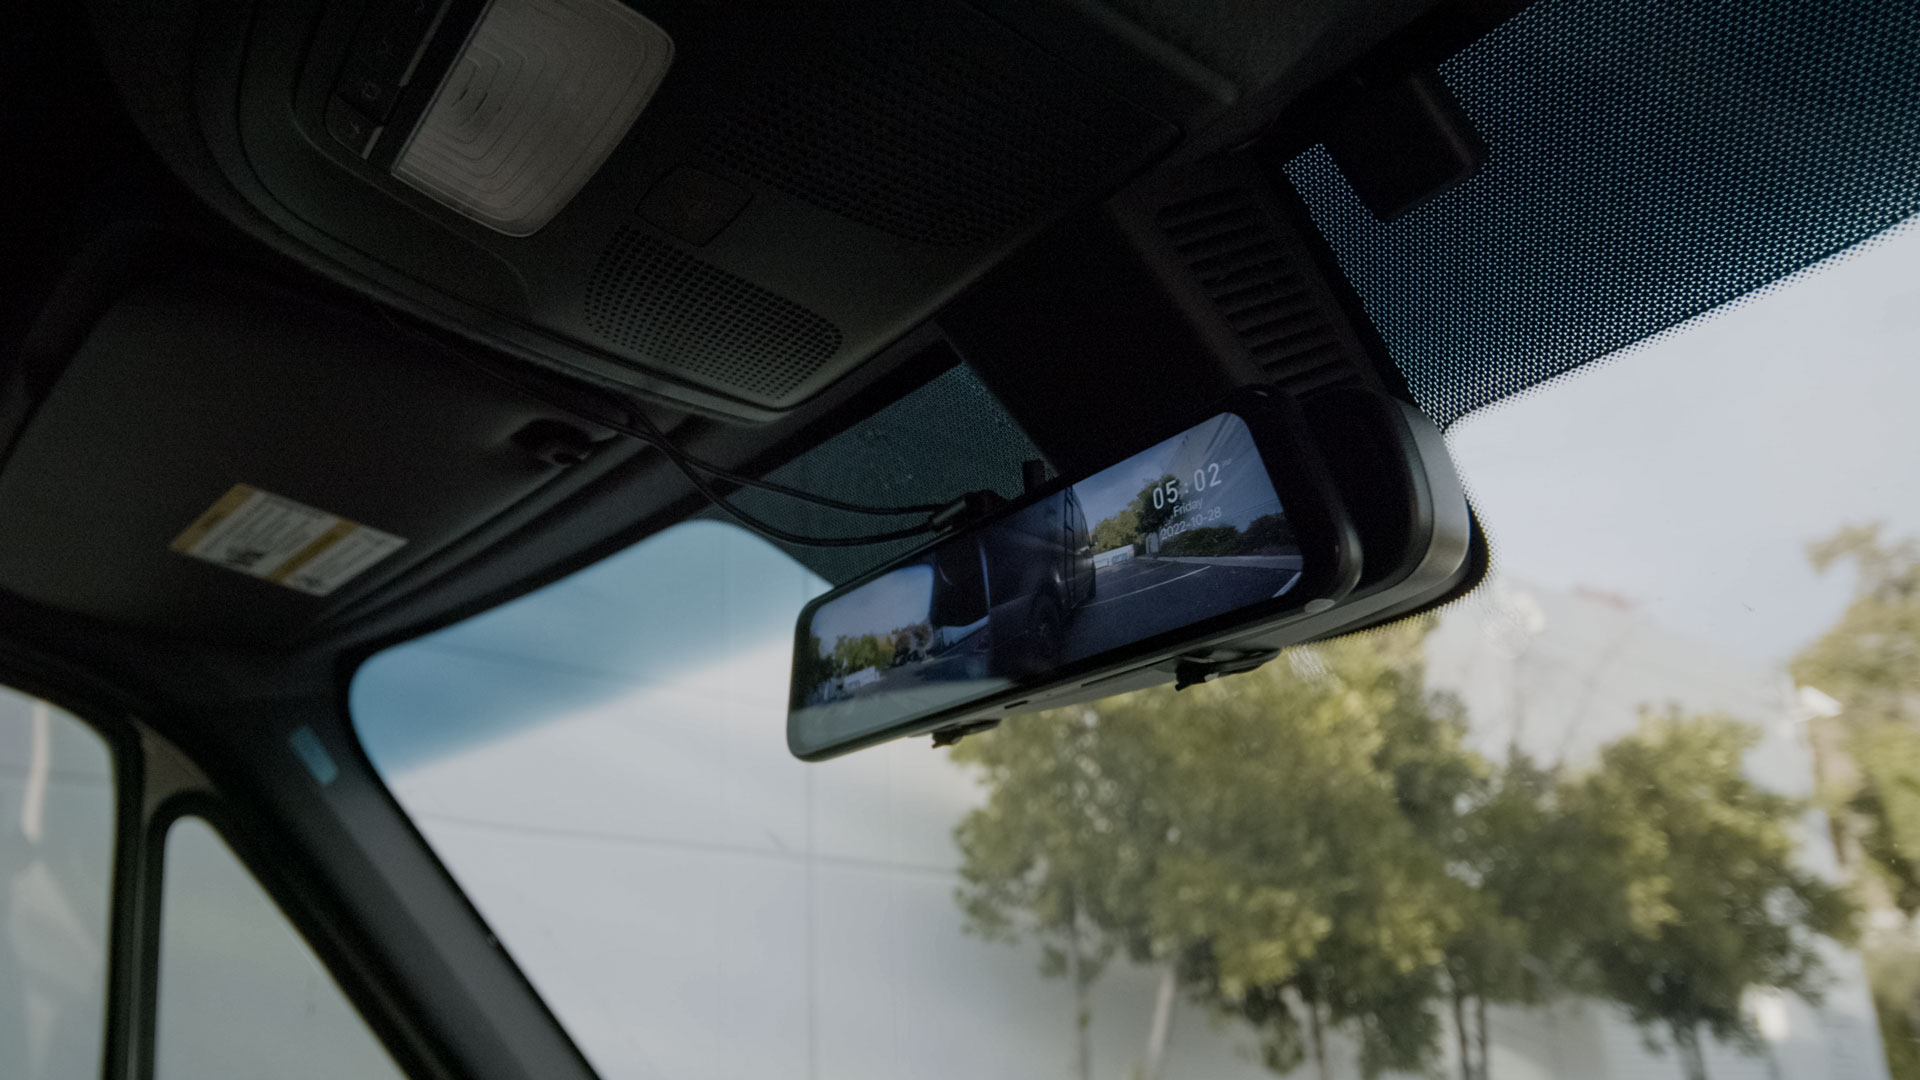
Another essential add-on to keep our van safe both when driving and when parked was the Wolfbox rearview camera. It can be used as a rearview mirror while driving, and doubles as a dash-cam that is always recording front and back, even while parked on location. Last but definitely not least, we added a middle seat to accommodate for a third crew-member to save us from today’s gas prices on any smaller shoots we have.
You can plan out every little detail before physically starting the project, but so many new ideas come to mind when you reach the build stage, and even more so when you put it to use. The shoot that rushed us to get the van in a working stage was a blessing in disguise. I’m not sure we could have ever gotten it right the first time, but that push allowed us to get started and prototype our way through the process.